MYOG: bug net for sleep and wear

This is another super simple piece of equipment. It is suitable to fair weather, but bug infested, trips as well as tarping with bugs. With spring coming, so are the bugs, so it is a timely moment to talk about it. I got it together nearly two years ago and have used it with very satisfying results on a few trips since then. I remember being particularly happy I had this along for the last night in the Flattops.

What is needed:
2 yards mosquito netting
8 feet cord
~1 inch grosgrain
For the netting, I used Nano NoSee-Um netting from Dutchware. It is 2/3 oz per square yard and 54 inches wide, which is minimal but enough. The cord is "yellow nylon draw cord 1/16 inch" from Outdoor Wilderness Fabrics. It is strong, but there is no great strength needed to hold the hiking stick in place. I tie knots rather than use tensioners.
Construction:
Find the center of the netting. Cut the grosgrain in half and attach it to the center so that it sandwiches the netting. Attach the cord at its center to the grosgrain. This can be the full extent of work. (Indeed, I have been using it like this.)


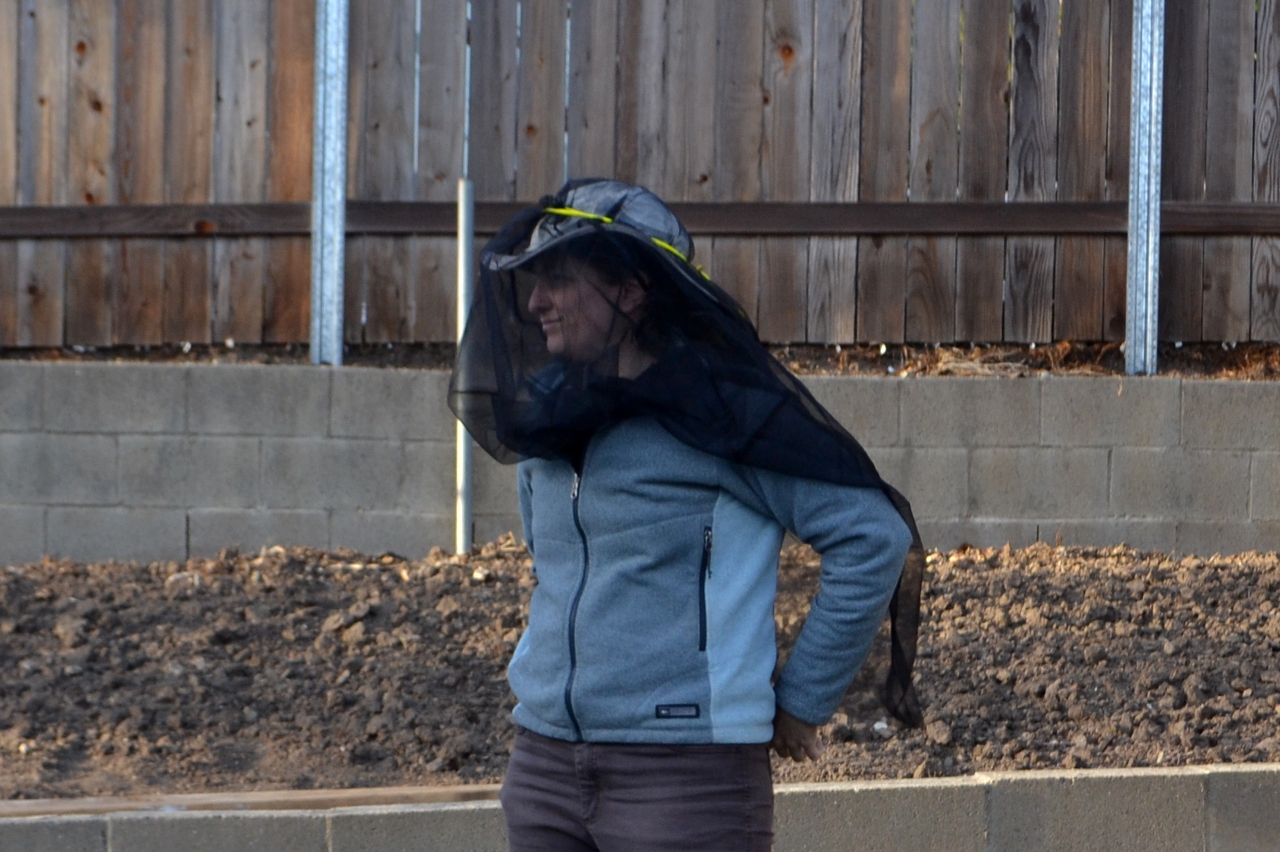
This looks much the same in set up and worn:

Finished item as I have done it comes to 1.83 ounces. Before the shaping, it was 2.10 ounces. Besides the (slight) weight savings, the lighter one is more comfortable to wear because it has less bulk.
How to set up:
For sleeping in the open, tie the mesh to a collapsed hiking pole or found stick. Place the pole end in the dirt just above the head and stake it so that it leans over where the sleeper's head will be. Anything around that is handy to tie to like trees or rocks can be used too. Place stones around the edges. The most important stones pull the far edge out so that the mesh does not rest upon the sleeper. (See the placement of the bricks for reference.) For getting in and out, one of these stones will need to be moved and replaced. Do so by picking up the stone rather than pushing up the mesh to prevent ruining the mesh.
For sleeping under a tarp, there may be locations within to tie to rather than using a hiking pole. I have used it with my tarp by tying it halfway up a hiking stick that was supporting the tarp. Again, stones need to be used to hold down the edges.
For wearing, it is used with a brimmed hat. Tie it on around the crown, then loop it down from the back and tie in front to close in the bottom. It can also be tucked into clothing. For eating, let it hang loose for a mostly bug free existence. It can be finicky to wear, but I find head nets stuffy so this is far superior. For hiking, the back must be stuffed into clothing so that the pack does not pull on it.
Possible future adjustments:
Length may be excessive for the back/above the head, so one side could be trimmed.
An attachment point on the top middle of the quilt would be nice.
Liked this? Interesting? Click the three bars at the top left for the menu to read more or subscribe!


Comments