Most tents these days seem to have a "fast and light" setup with just the footprint and fly. My Eureka Flashlight copycat tent (Alps Mountaineering Mystique 2) is not one of those. As something on the "inexpensive" end of the backpacking tent spectrum and a few years old, it weighs in pretty near 4.5 pounds and nearly half of that is the tent. It turns out, it really is not that difficult to do a "fast and light" setup for this tent. (Incidentally, the only slightly changed obnoxious orange ones they sell today still do not have a "fast and light" setup. Current minimum weight is 4 lbs 9 oz.)
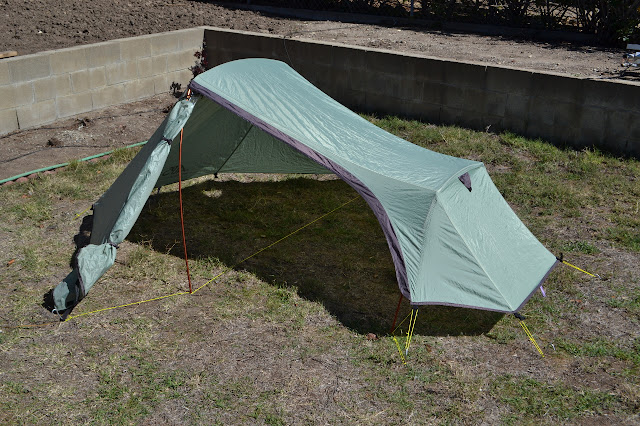
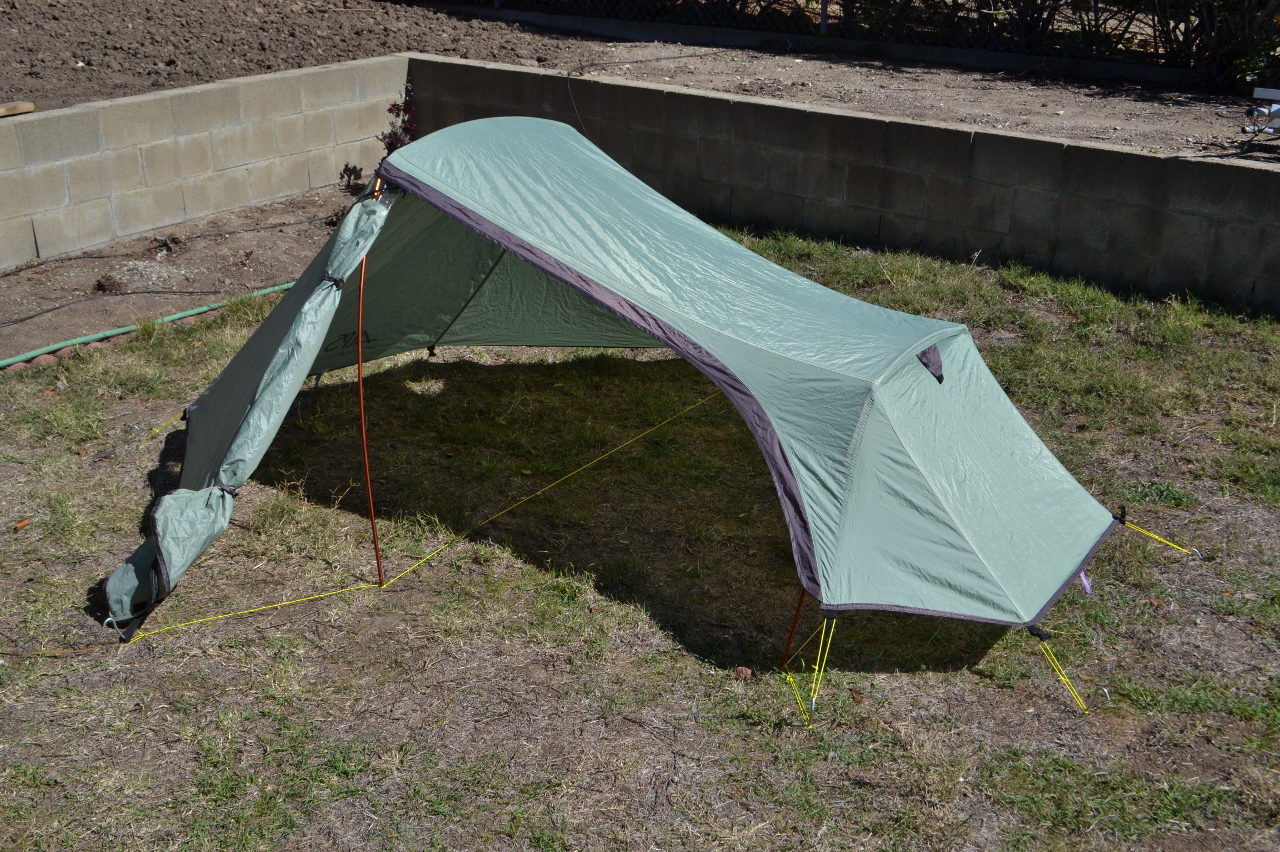
Mildly lopsided, but that does not seem to be a problem. All set up sans tent.
Required material:
~25 feet of guy line, but the more the merrier
I used "yellow nylon draw cord 1/16th inch" from Outdoor Wilderness Fabrics. This is strong and has no stretch to it whatsoever. Also, quite obviously, it is nice and bright. It is suitable for use at guy line.
Construction:
The poles need attachment points on the fly. As it comes, there are four Velcro loops that attach around the poles, but these are not strong enough to use. Take four pieces of line long enough to comfortably tie around the poles. Sew these through the base of each Velcro tab. When tied, these lock down the Velcro around the poles.
Line pulled through the base of the Velcro tabs.
Tied to lock down the Velcro tabs around the pole.
On their own, the poles will spread wide. They need something to pull them in toward the middle. The solution is more cord. For the head side, take a length of cord 10-12 feet long. This is long enough to go across the entire width of the tent and vestibule area plus some room for knots. Tie two loops, each about 31 inches from the center. The loops should be just big enough to pass over the ends of the poles but not big enough to pass over the pole itself. Tie a loop at either end with a slip knot to take a stake. (A rolling hitch is typical for the end of a guy line.)
For the foot side, take a length of cord 6-8 feet long. Tie loops in it about 21 inches from the center as before for the pole. Tie loops at either end as before for stakes.
Pole end stabilized by cord.
I just used an overhand knot to make the loop.
Cord to keep the poles placed and tensioned.
Head end too.
Loops for stakes are needed around the edges where the fly would have been connected to the tent. Take foot long lengths, thread them through the loop the buckle is attached to and tie it. I just used big loops, but more traditional guy line modes would be fine too. Presumably one could take a hammer or saw to the clips to remove them if one never wanted to use the fly with the tent again.
Just need a little guy line.
Set up:
Expand the poles and lock them into the Velcro attachments. Tuck the cord loops over the ends.
Start at the head end and place two stakes so the front is tight enough. Place the front pole as desired. Pushing it up toward the front will make the fly higher for more air flow while sliding it back a little can lock it down tight. Place the back pole. Without letting go on the tension holding up the tent, place the two stakes at the foot.
Place the stakes around the side so that they hold both the fly edge and the end of the pole cord.
Ready to keep off the rain.
Weights:
Fly and all guy lines: 1.55 lbs (705g)
Poles: 0.78 lbs (352g)
Stakes (8 of those provided with tent): 0.27 lbs (122g)
For a total of 2.6 lbs (1179g)
Tent left at home: 1.76 lbs (797g)
Note: the loops that I have added at either end of the fly are due to its tendency to sag onto the tent in everyday use. Those are not needed for this setup.
Thoughts:
It seems very forgiving of getting things placed a little lopsided. It is pretty solid standing and still quite solid with the doors open. It is a rather comfortable space on the inside, if a little short, and the vestibules give a lot of elbow room. One might even be comfortable using it as the two man space the tent was designed to be. Admittedly this is only the second time I have set it up this way. Testing up on a ridge in a minor storm was the first. Yes, it probably was foolish to head out without actually checking that it would work, but I had a clear vision and managed not to forget anything. There was enough wind to keep things ventilated, but not too bad, and it did not care. It rained a couple times (that I was awake for) and not one drop hit me.
Yes, I can keep the bugs off with my bug net hung from the pole.
Hope that is understandable to anyone with this or a similar tent and wishing it was lighter, but not wanting to spend loads of cash. Also, I hope people with other tents without a "fast and light" setup might find my procedure to develop this setup helpful.
Get link
Facebook
X
Pinterest
Email
Other Apps
Liked this? Interesting? Click the three bars at the top left for the menu to read more or subscribe!
Coconino National Forest Click for map. I seem to be collecting fire lookouts, but the inclusion of Wing Mountain on the list of Arizona lookouts on Peakbagger wasn't what got my notice. It was the simple fact that the quad west of Humphreys Peak is named for Wing Mountain. I'm a bit suspicious about it being a lookout because there is not so much as a trail going up it, much less a road that is common for such things. People who have climbed it seem to have just picked a side and gone for it. I picked the side where there is a shoulder called Little Wing Mountain so I could climb and get the benchmark, then move nearly halfway around the crater to the high point. It is a side that looked highly climbable from afar, which seems like another plus. Forest road 222 (Wing Mountain Road) in seems generally maintained, but 519 only happens to be passable for my little car by a bit of luck. I park at 9230C where someone has had a camp site. It is a little way down the hill fro...
Since I last wrote about digital maps, the S1 Mobile app has been shut down and the Forest Service released a new map app that looks pretty good. It might be time for a new post on maps. (Check the "equipment" tag for older editions.) USFS app in offline mode showing a section of the Pacific Crest Trail north of Marble Mountain Wilderness including intersecting roads, streams, and contours. As before, this will focus on legal, free ways to have maps stored on your handheld computer (AKA "phone") so you can have them anywhere and any time. While these are free, it does help insure that independent developers keep going next year if you send some money toward them. My criteria for a map app: Works offline. If you only have a map when online, you don't have a map. It is as simple as that. This is non-negotiable. Maps should include contours. I'm looking to hike with these maps after all. Shows location. User configurable storage opt...
Redwood National Park Click for interactive map On the prior Thursday, I joined the California Invasive Species Advisory Committee's invasive species tour of Eureka. It was at the last minute because I figured I knew all about these things since I spend a bit of time each week hacking them down as a volunteer. Of course, they were talking about the lesser known things and the tour started out with aphids that affect Sitka spruce terribly as we toured Mouralherwaqh, a patch of land that is Wiyot again. This one is not open to the general public, but we also visited the 'O Rew Redwood Gateway, a piece of land that is Yurok again, and is open to the public as of 1 Aug and where I discovered a new trail. I also noted that although this was most recently an abandoned mill site, there are some nice rounded tree tops poking out of the forest nearby, one of the signs of old growth. I decided I would be back to try that new trail. The sign at the after hours/overflow parking a...
Patapsco Valley State Park interactive map link I was charged with deciding on a hike that kids could do, except I have no experience in this or in evaluating what a particular kid can do. Plus, I would be without any parental supervision. Alltrails offered up Cascade Falls as a possible suitable suggestion, except that it would be done on the weekend and is a very popular location. I liked a climb on Garrett's Pass and a drop on the Cascade Falls Trail, which is 4 miles and only 300 feet or so from bottom to top. (It goes from ~20m to ~100m.) That's not so much, right? And I even had the means for up to 2 kids to be self sufficient, able to carry water, snacks, camera, and a light sweater on their own. Self sufficiency for the win, right? The hike would be in the Patapsco Valley State Park, like most my hikes would likely be. This park has a mix of free lots and pay lots. The pay lots have different prices for in state or out of state, weekends/holidays or weekdays. T...




Comments