I took a few hours to play with setting up the tarp for sleeping shelters. Why would I do this if I own a fancy tent? Well, there's two reasons. First, I think it's just a good skill to have. Of course you have to do it more than a few hours, setting each thing up once, to really learn it. Second, I keep pondering what the car camper who wants to try backpacking minimally needs to just get out there. Gathering up the camping gear and then seeing what needs changed out to bring it to a reasonable weight seems like a good start. With today's penchant for huge cabin tents, that has to go. But maybe the tarp it sits on is all you'd need? And who knows, if you decide you actually like tarping it, you'll never have to spend the big bucks on an ultralight tent.
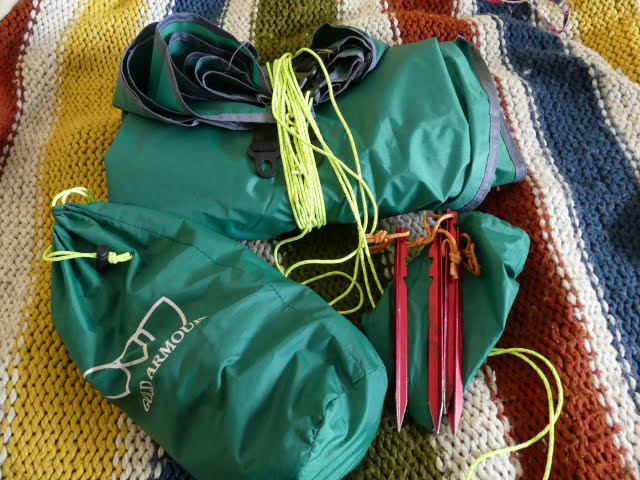
The tarp in question for this exercise was one I picked up for about $30. It is 10'x12' weighing in at 850g (30oz) of coated polyester and came with 4 stakes and 6 guy lines. It has tie outs at the corners and centers of the sides, all with reinforcement. It also has one tie out in the center, but this doesn't even have a bar tack to reinforce it. With some found tree straps, it has sheltered my kitchen, providing plenty of room for table, chair, and a box of kitchen gear through a couple month's worth of storms. I popped a cheap carabiner in one wind, but the tarp only shows wear where it rubbed trees. The brand happens to be "Gold Armour" and is one of those things you can find on Amazon. The current variations have more tie outs for a couple dollars more.
The tarp, stakes, guy lines, and bags for this exercise. It'll actually use more stakes, but this is plenty of line.
And what can I do with it? Well, for these, I stuck with things that can use just the loops provided plus two poles to hold it up. A more sophisticated tarp will have well reinforced loops in the middle as well as more along the edges. It is actually possible to "invent" a new tie out spot by simply placing a stone behind the spot and tying the line around the bump made, but that does tend to generate extra wear and sometimes holes. I found a number of pages with suggestions, but they seemed to run out of steam for instructions when they got to more complicated setups. This one seemed to have simple and complete instructions for setting up tarps.
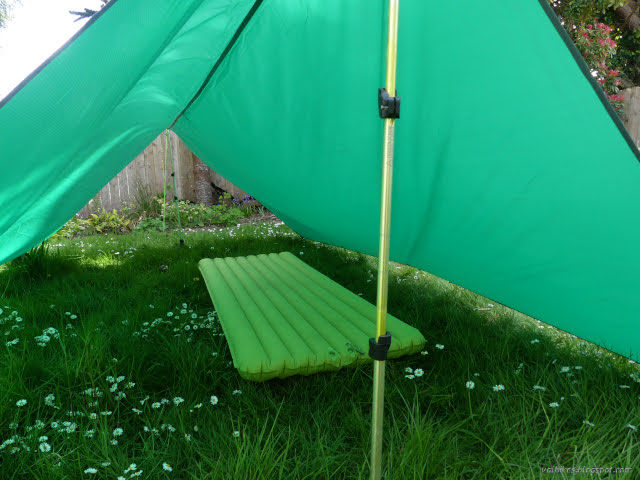
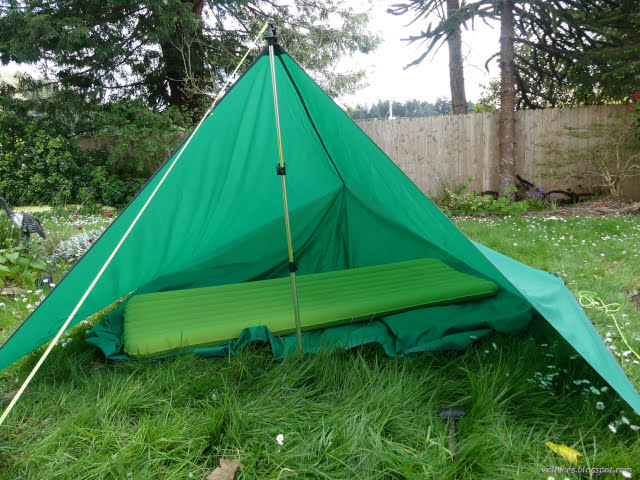
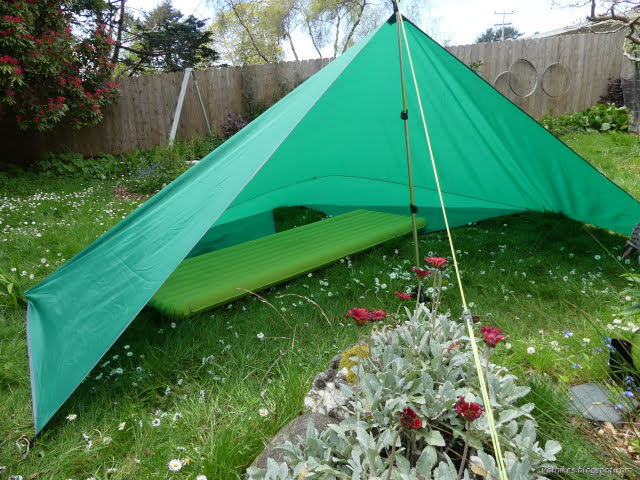
A-frame pitched low on the sides.
The most spacious and simplest pitch is the A-frame. Stake down the corners in two parallel lines, then set up the poles in the middle. Stake the centers last. With higher sides, or just one higher side, this could easily sleep four in mildly stormy conditions. (Meaning rain without wind, or at least not changing winds.) It takes a lot of room for a tarp this size.
Tossed in the regular-wide mat to show how much room there is, but also emphasis how two opposing ends are open and a wide space is set against the wind.
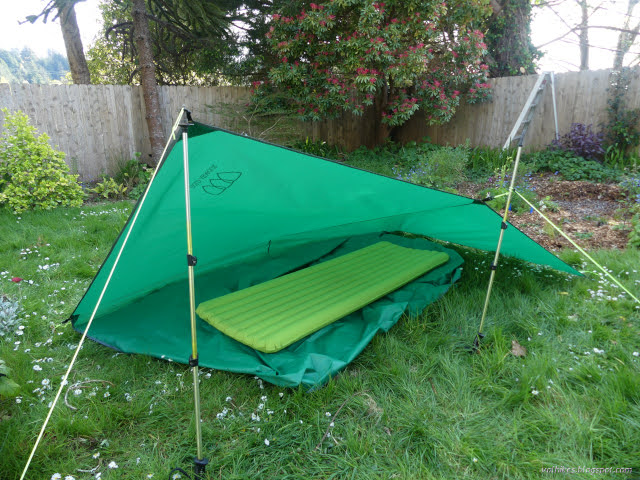
I decided to modify it a bit by dropping one end. If the dropped end is set into the wind, there's a much smaller for it to hit. I tend to look for ways to stick my feet into the wind since this tends to keep the whole thing much warm when cowboy camping. Moving the pole inside to the center and staking down the center back.
The center pole is a weak point in this. It has no attachment at the top and when winds cause the tarp to billow upward, it tends to fall over. It could be staked out on its own or the tarp tied around the top.
Still loads of room for a couple people, but that center pole is likely to come down in gusty situations.
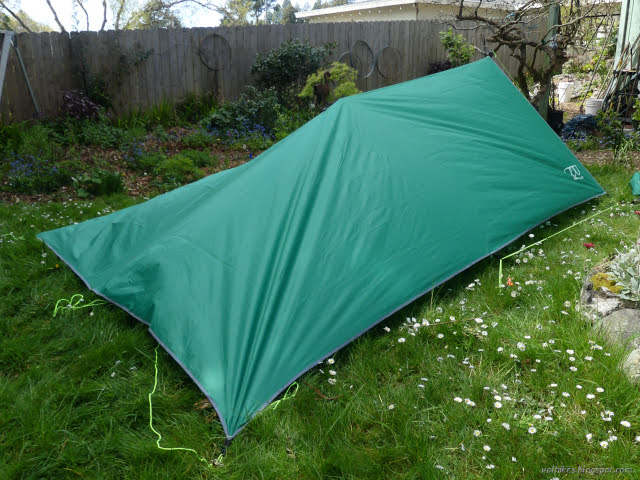
There are some more standard A-frames with a closed end also called a Holden tent. I tried out a few variations on this. First, I reduced my tarp in half, so it's really a 6'x10' with ground cover. Stake the back down, then guy out the pole and stake the sides. I put up the pole on the long side of this reduced area, so this is another setup with one's broad side to the wind rather than feet. (Doesn't history have something to say about showing the enemy one's broad side?)
Still lots of room for one person with half the tarp in a closed A-frame.
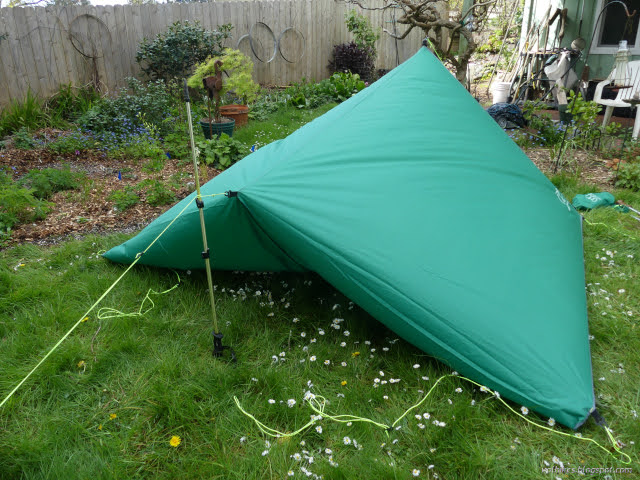
I decided to get a little more room at the back by lifting it up on that center tie out. Unfortunately, it showed that it would break out given some good wind. Tie outs without reinforcement are just not tie outs. Coming around the front, I did get a little more room on that side, but lost space for head and feet as the tarp came in just a little too closely.
Raising the back to get more room, but it forces the side stakes to come in a little and the tie out can't take much pulling.
Had to twist the mat to make sure it had enough room at head and foot. Not a good setup.
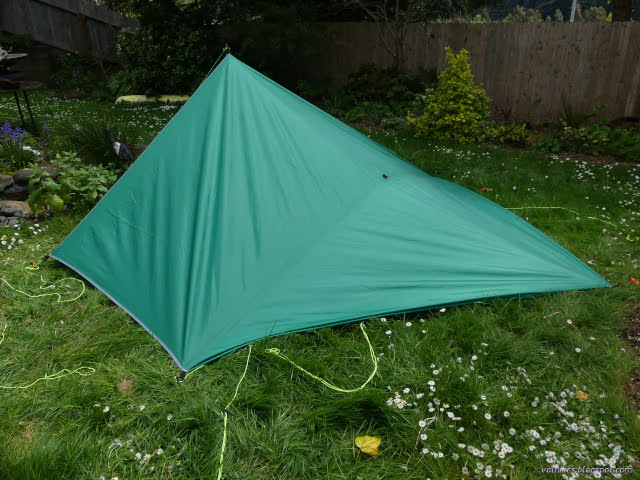
I can also use the whole tarp for this sort of set up. It's so long that much of the thing is lower than desirable.
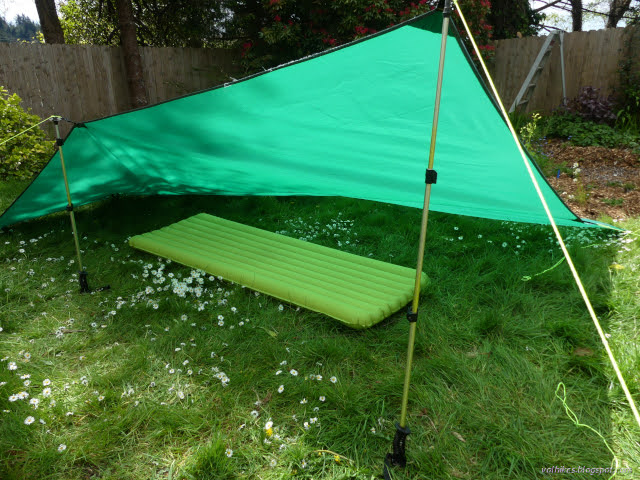
But continuing with modifying this, one doesn't always need three sides. Two sides can often feel just as secure and I've gone through a few hail storms in such a shelter. I'm not finding this one named, but I do see it represented in people's actual setups.
Stake down two sides, then pull up the corner and side.
Plenty of room and plenty of view and with this huge tarp, a bit of ground cover too. Loads of protection when the storm isn't getting too active. It can be pitched bigger, but I'm not so certain it's an improvement, especially if there's only one under it.
Plenty more room under the whole tarp, but a lot of it is low.
Getting into some of the more complicated setups that can be down with this tarp with limited tie outs, I tried out the Adirondack. Three sides and a bit of a door! Longer poles might be desired with a tarp this size. The sides don't come in very much with the tools I had on hand. In spite of the instructions I read, it was simple to set up by myself with poles. Just stake the middle of two sides around a corner, then guy out the poles on the other two middles, then stake the sides at the end.
Adirondack coming out a little long and narrow, but still lots of room for one with this giant tarp.
I wasn't quite settled on this really being a closed up style and tried out the bivy bag tarp shelter. A lot of this long tarp is practically on the ground with this. The tarp may not leak where it's touched since it has a thick coating, but otherwise, this probably ain't where it's at.
Not a lot of room in a bivy bag tarp shelter, but plenty of ground cover. This uses a diagonal ridge line.
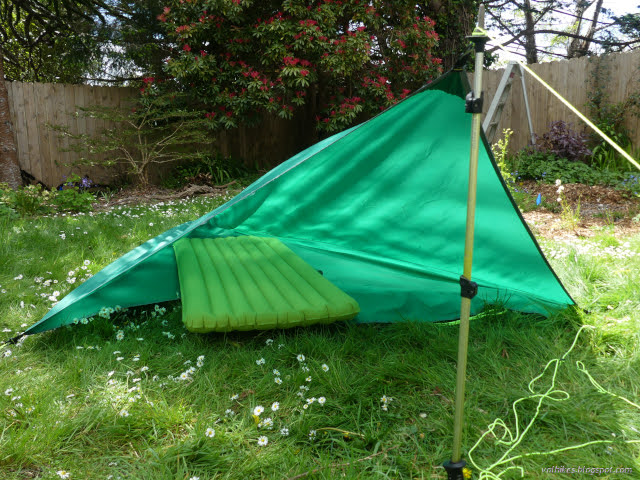
Making use of middles as corners, I put together one more that actually works out quite nicely. It's sort of a vastly simplified "tarp tent", but for having only basic tie outs. It's still an enclosed A-frame, really. It's good to go full circle.
Lots of room under this tarp. There's a huge corner left over for keeping gear, using for a kitchen, letting the dog come in.
The back makes a big ramp for the wind to ride up instead of into. Well, one can hope, anyway.
So there's a few ways to pitch a simple and cheap tarp. It weighs less than my fancy tent, can be pitched in many ways that give a lot more room, and one could have about 8 of them for the same price. On the other hand, there's much skill required to make it work and it may not be locked down quite so easily.
Uncompahgre National Forest (map link) The Forest Service seems to be uncertain if it is Lake Hope or Hope Lake, but more certain that it is the Hope Lake Trail. It consistently marks the road up to the trailhead as a 4x4 road, so I parked in a turnout at the bottom and started up, getting increasingly grumpy about how it is a rather good road with a loose rock here or there. I chatted with some campers about how it was probably great all the way up, but they'd gotten to their rather brilliantly picturesque site and been sufficiently mesmerized by it not to continue on. Talking with them got me sufficiently emboldened to actually stick out my thumb at the truck that came by as I finished the chat. When you're going 5 MPH anyway, it's easy to stop, and he did. Greg was going for the hike too and actually wouldn't mind having a buddy. The road promptly turned to something it wouldn't be wise to try the Scion on. With good judgement, I probably could make it, but...
Humboldt-Toiyabe National Forest ( map link ) I had a big day planned and got up in the early cold. That first dim, dawn light played in a band across the western peaks of Lamoille Canyon. The edge of it diffused downward into the rest of the canyon and then the band was repeated, this time with the first light of sunrise. It took a lot longer for the edge of this light to travel down into the bottom of the canyon and I was long on the trail by the time it did. Trailhead at the end of the road. Detailed signs about possible destinations are a short way down the trail on the left. Looking behind to a long canyon of shadow A pleading to stay on the trail in this fragile environment There are two trails to choose from for going up. The hiker trail travels the east side of the canyon, so would be cold longer, but would look across to the lit part of the canyon, which I hoped would make for better photographs. The stock trail climbs the other side and I could see it sitting...
Apache National Forest Click for map. What struck my fancy to hike while at Quemado Lake was Escondido Mountain, although I'm not sure how one can get away with calling a 1800 foot prominence peak "hidden" is beyond me. It has no trails up it, so I have to determine my own route. Escondido Trail caught my eye first, but it really doesn't go high up the mountain and it doesn't do it on one of the steeper slopes. The road it starts from looks like a better bet, follow it up as far as it goes then grab the ridge tot the right. The easiest way up, though, looks like a 4WD road that starts further south on the (should be) Scion friendly Baca Road #13D. This one climbs high up to a saddle west of the peak leaving less than a mile of ridge walking to the top. Although it means a couple miles road walking on something I can drive, I think I'll combine the two into a loop. I just have to find parking near the intersection of 13D and 4018J, which is pretty eas...
Little River State Beach, Trinidad State Beach, Sue-meg State Park, Humboldt Lagoons State Park Redwood National Park, Prairie Creek Redwoods State Park, Del Norte Coast Redwoods State Park Introduction The California Coastal Trail (CCT) is approximately 1200 miles of interconnected public trail following the coast from Mexico to Oregon. Or at least that's the dream. Currently, the trail is about 60% complete. In more populous areas, it often takes the form of boardwalks and multi-use paths marked by the swirl of blue wave crest. In rural areas, it may be pushed to the beach when that is usable, or to the nearest public route when that is not. The crest for the CCT marks a coastal access trail at the Lost Coast Headlands. There are thoughts of a route beside the ocean, but the primary route is substantially inland along Mattole Road for now. The beach becomes impassible in several places south of here and above the high tide mark is private property. The hiking trail rout...


Comments